
Hello from rainy Belfast! Autumn is here, and for us painters, that means one thing only. HALLOWEEN! I’m going to admit right here, that I don’t especially like Halloween! It is great for business, and it is nice to be able to work on more detailed ‘one off’ faces rather than the usual party scene faces, but scary faces aren’t really my ‘thing’, and I do get a little frustrated by the seemingly endless stream of people sending photoshopped images from Pinterest and expecting me to recreate it with paint, for a fiver! That said, I am grateful to always be busy at Halloween, and I tend to work from home with private bookings now rather than take on events etc., which is nice, and saves a lot of running around from venue to venue.
This week I’m going to demo my super-fast ‘Walking Dead’ style zombie face, which is great for busy events, but still looks great. It doesn’t require any special effects materials, and can be produced in a few minutes. The beauty of faces like this is there is no right or wrong way to do them. The scruffier the better and each one is different to the one before. I had planned to do this as a live video but in my post flu comeback, I still sound like Gollum, so I’ve done it as a step by step with photos. Honestly though, experiment, have fun, throw some paint around and find what works for you!
MATERIALS USED
Snazaroo White
Global Light Blue
Global Lime green
Global Yellow
Paradise Black
Superstar Old Red (127)
DFX White
DFX Black
Global Red
Soft sponges
Grimas Stipple sponge
Lowe Cornell size 2 round brushes (I have one specifically for white and one for black)
TFPS pink tip brush flora size 6
TFPS pink tip brush round size 4
STEP 1.
Apply a semi translucent white base all over the face. I use snazaroo for fast bases and for children as it is fast and easy to apply, and, being glycerine rather than wax based, feels more comfortable on the skin. It is the only Snazaroo paint that I use, and although I have experimented with various other brands, this remains my favourite for fast light bases. The base doesn’t need to be perfect as it will largely be covered, but you want your zombie to have a pale background.

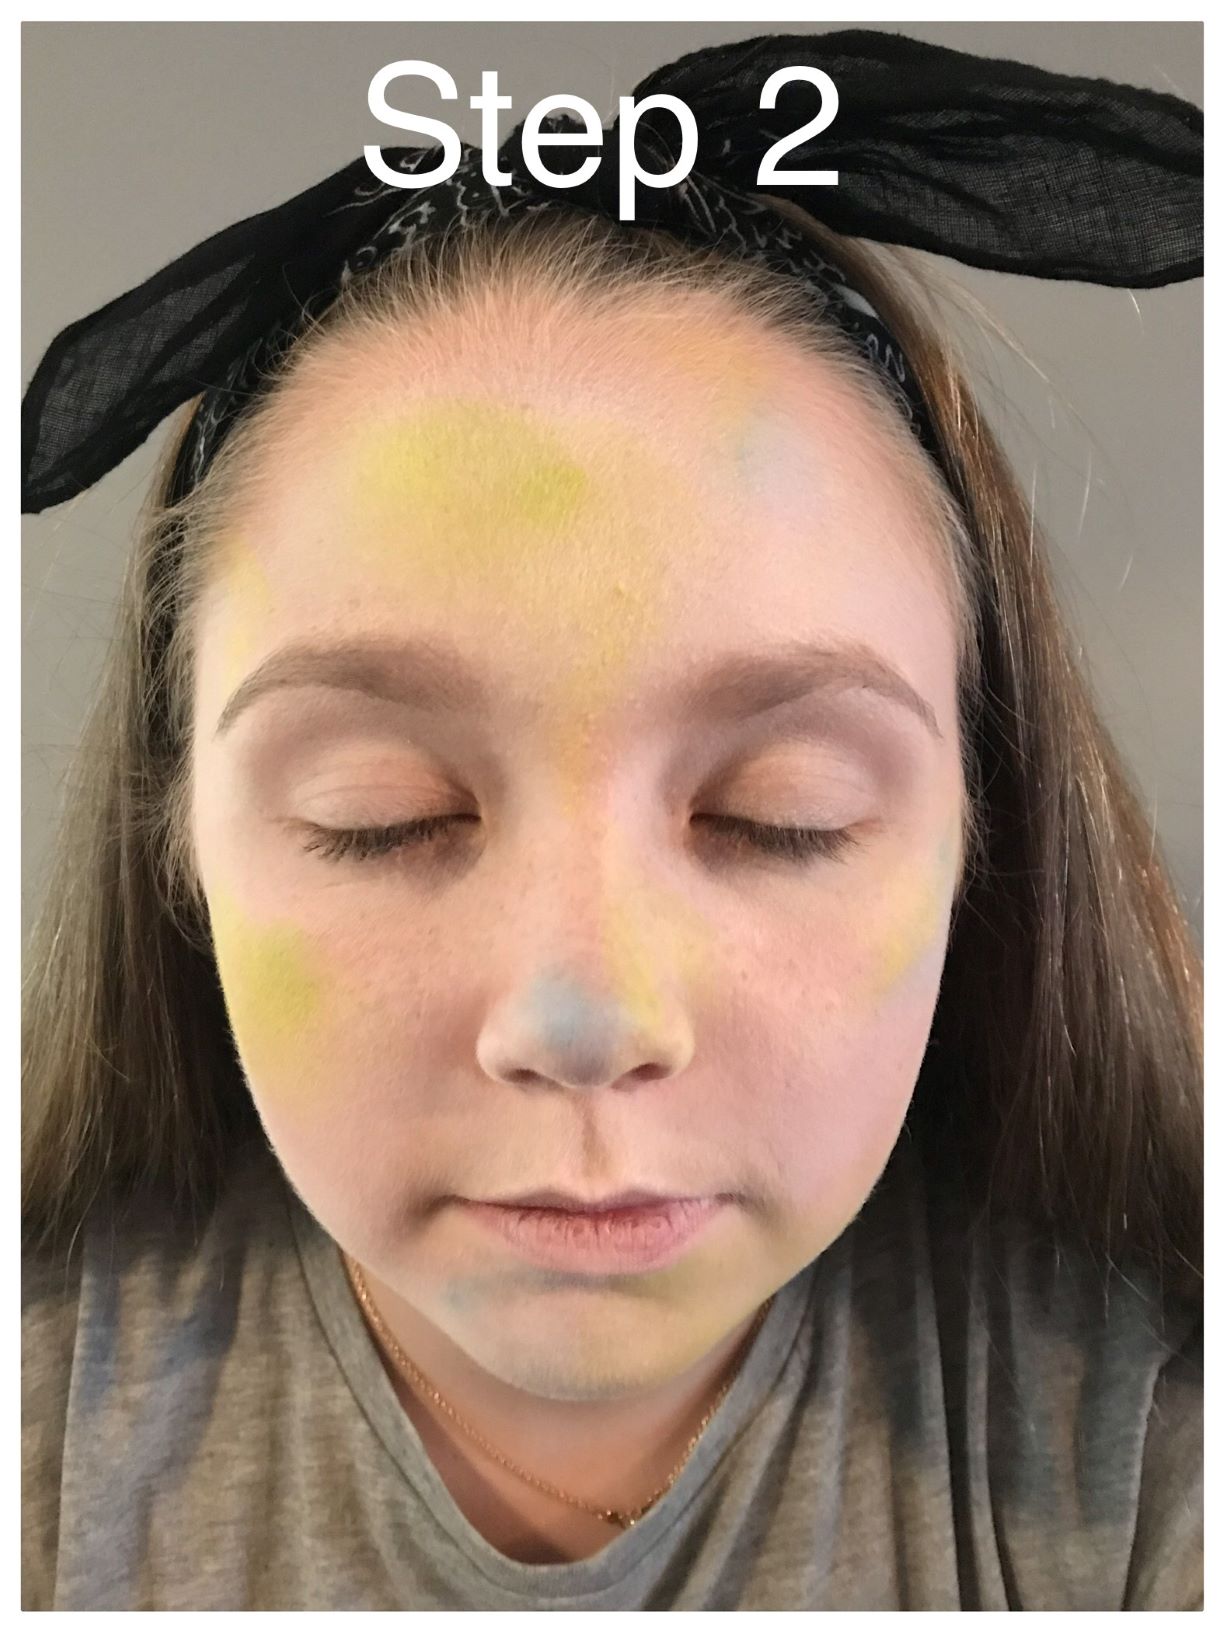
STEP 2
Load your sponge with the light blue, yellow and lime green paint and apply in random areas of the face. I tend to stick to areas that you want to highlight, like cheekbones, temples, forehead, nose and chin.
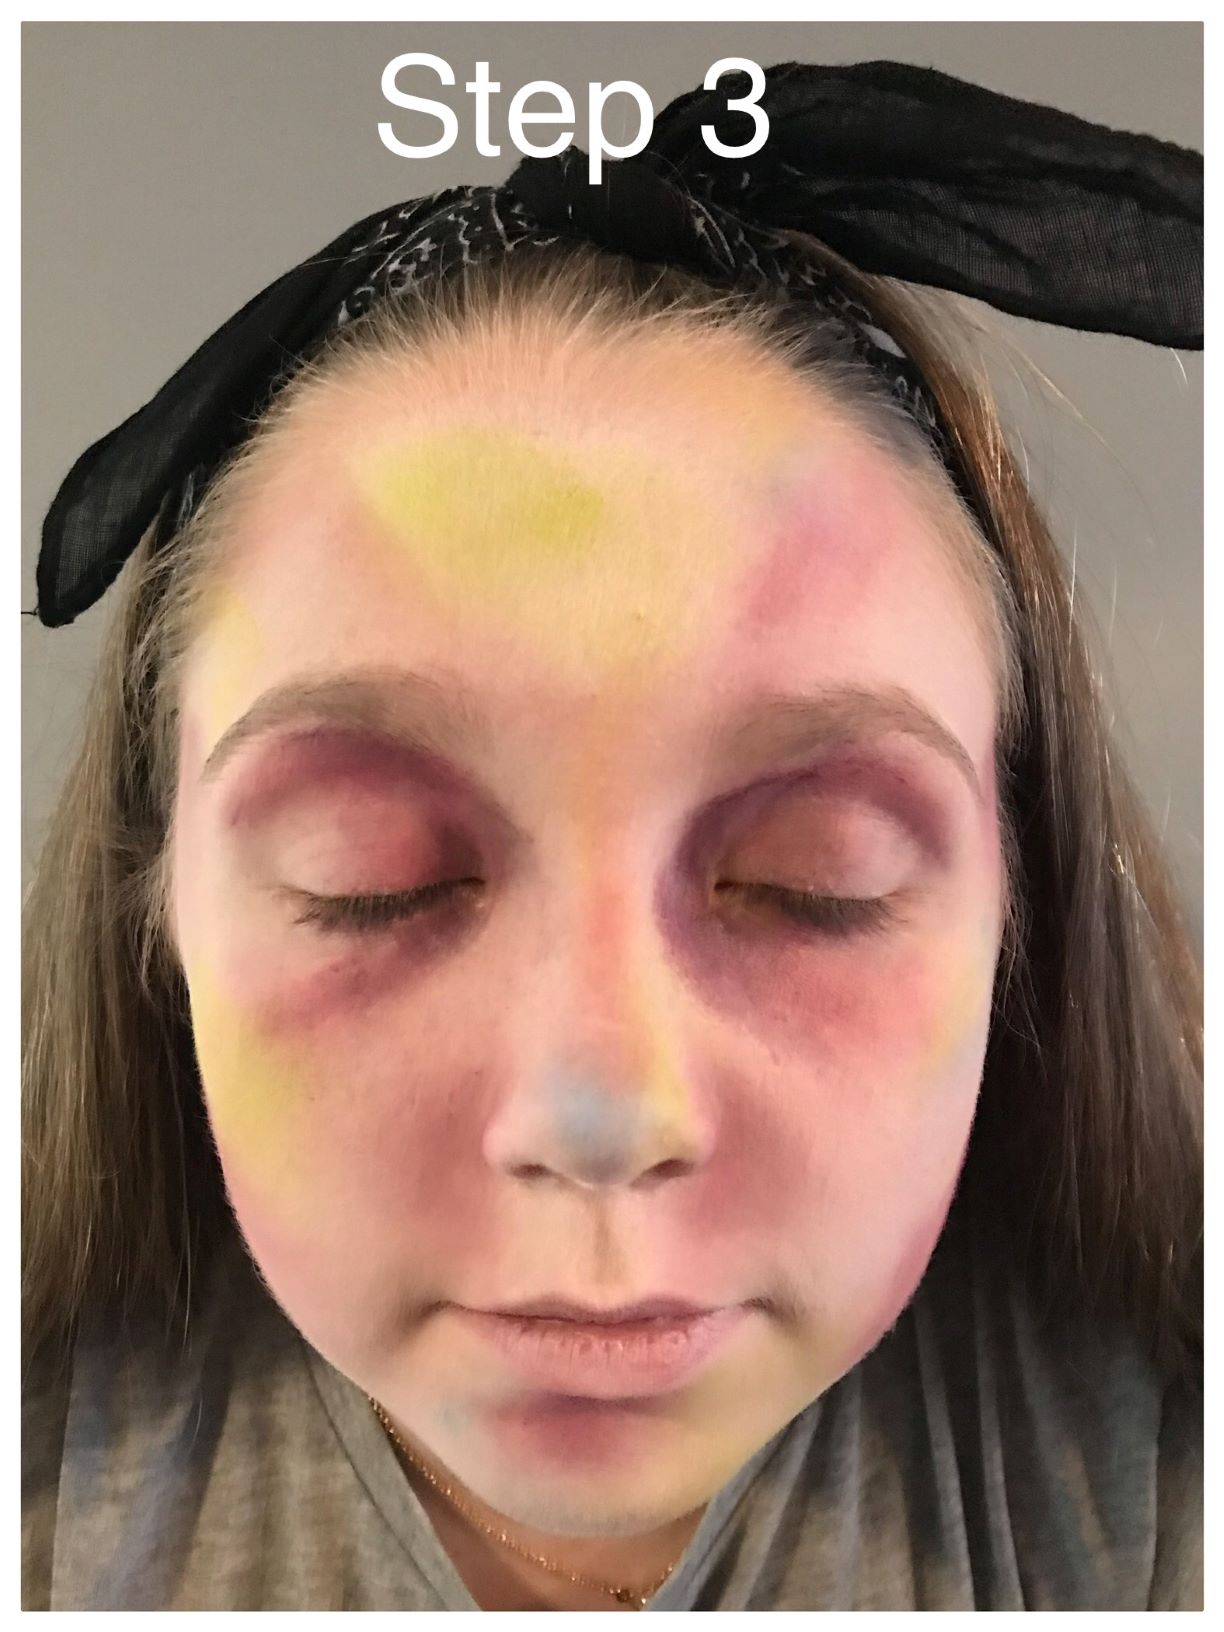
STEP 3
Lightly load a sponge with the Superstar Old Red, and use this to colour the eye sockets, cheeks and any other random area you fancy.
STEP 4
Load the stipple sponge with a mix of the Paradise Black and Superstar Old Red, and use this to add detail to some areas of the face, giving the effect of dried blood and scuffs.

STEP 5
Add some eyebrows. I always think that the eyebrows look a bit harsh when I’m adding them, but, having experimented with them a little, I find that the overall effect is better when they are dark and a bit severe.

STEP 6
Use the Global Red with the flora brush to add some cuts / scratches across the face. These can be anywhere you like, but I tend to do them diagonally across the face and one eye. Using a thin – thick – thin brush stroke you can get a more realistic looking scratch.

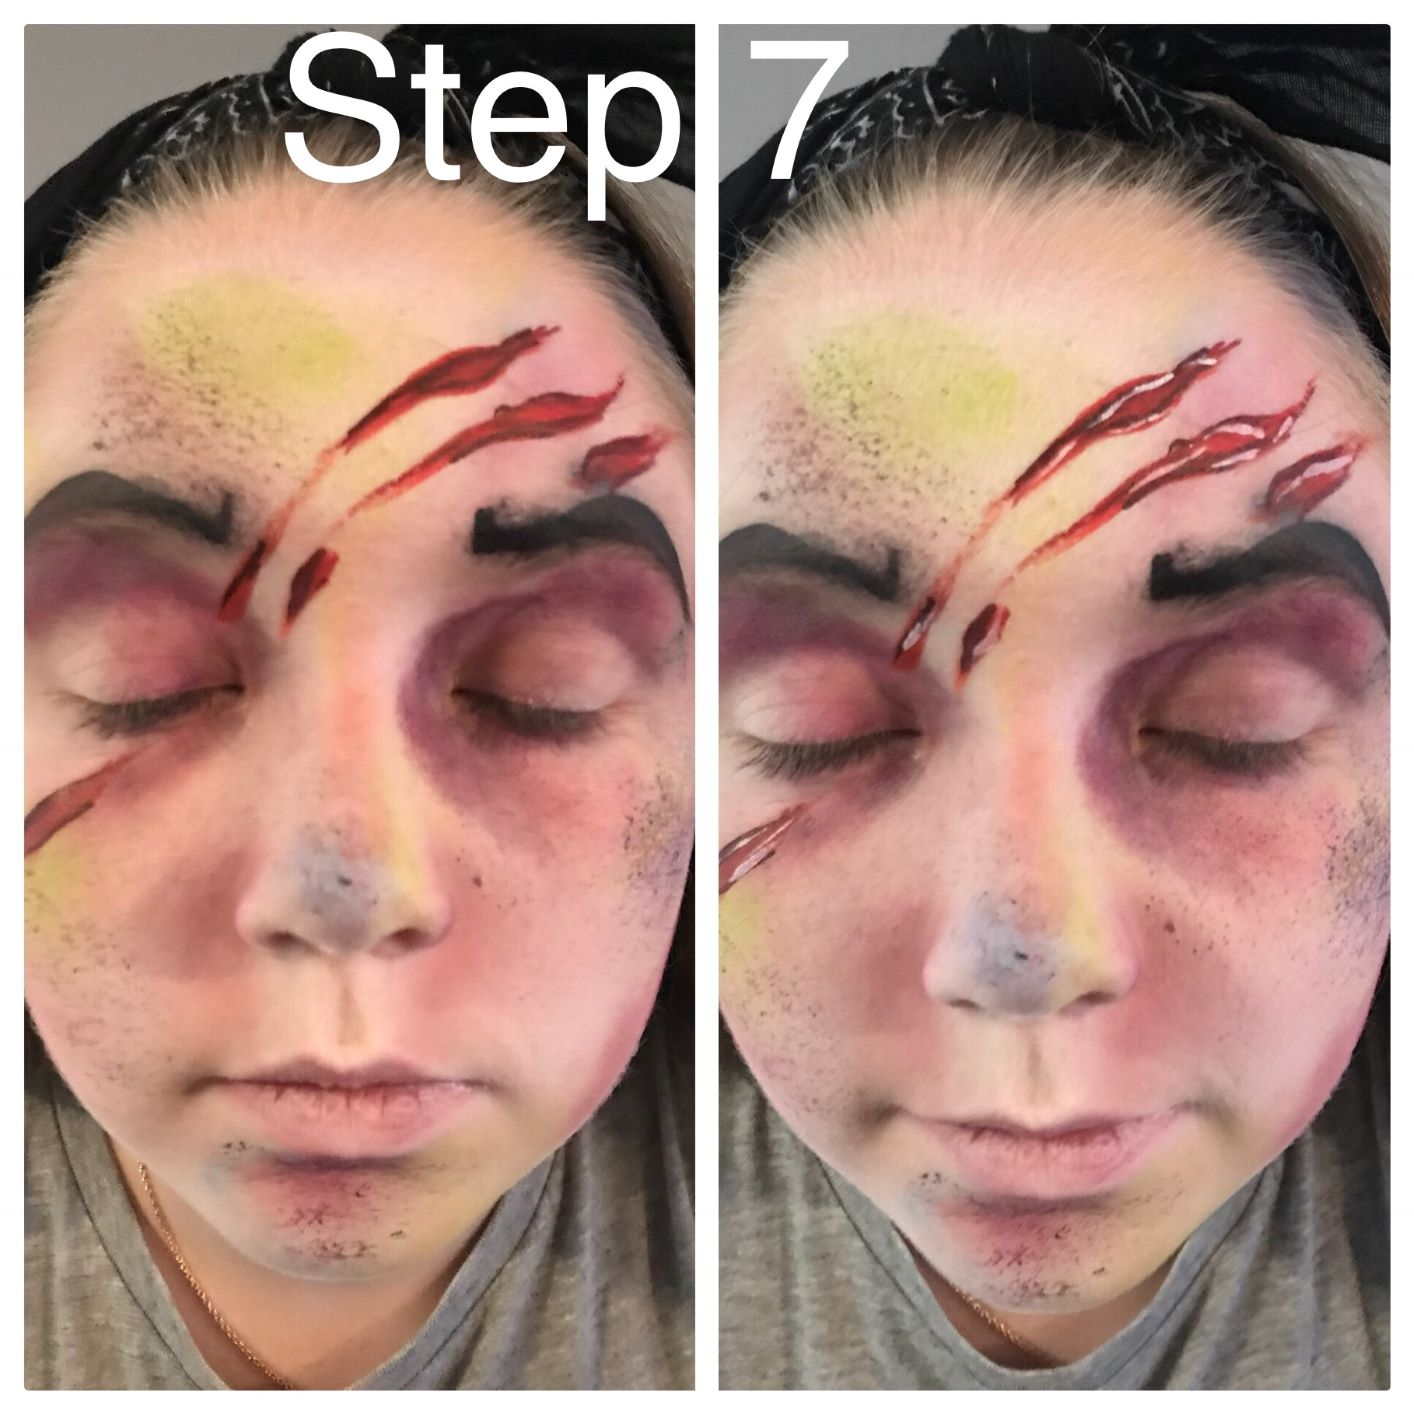
STEP 7
Roughly outline the scratches with the Number 2 brush loaded with some old red, and add some dfx white highlights. This gives the wounds some depth and gives a wet blood effect.
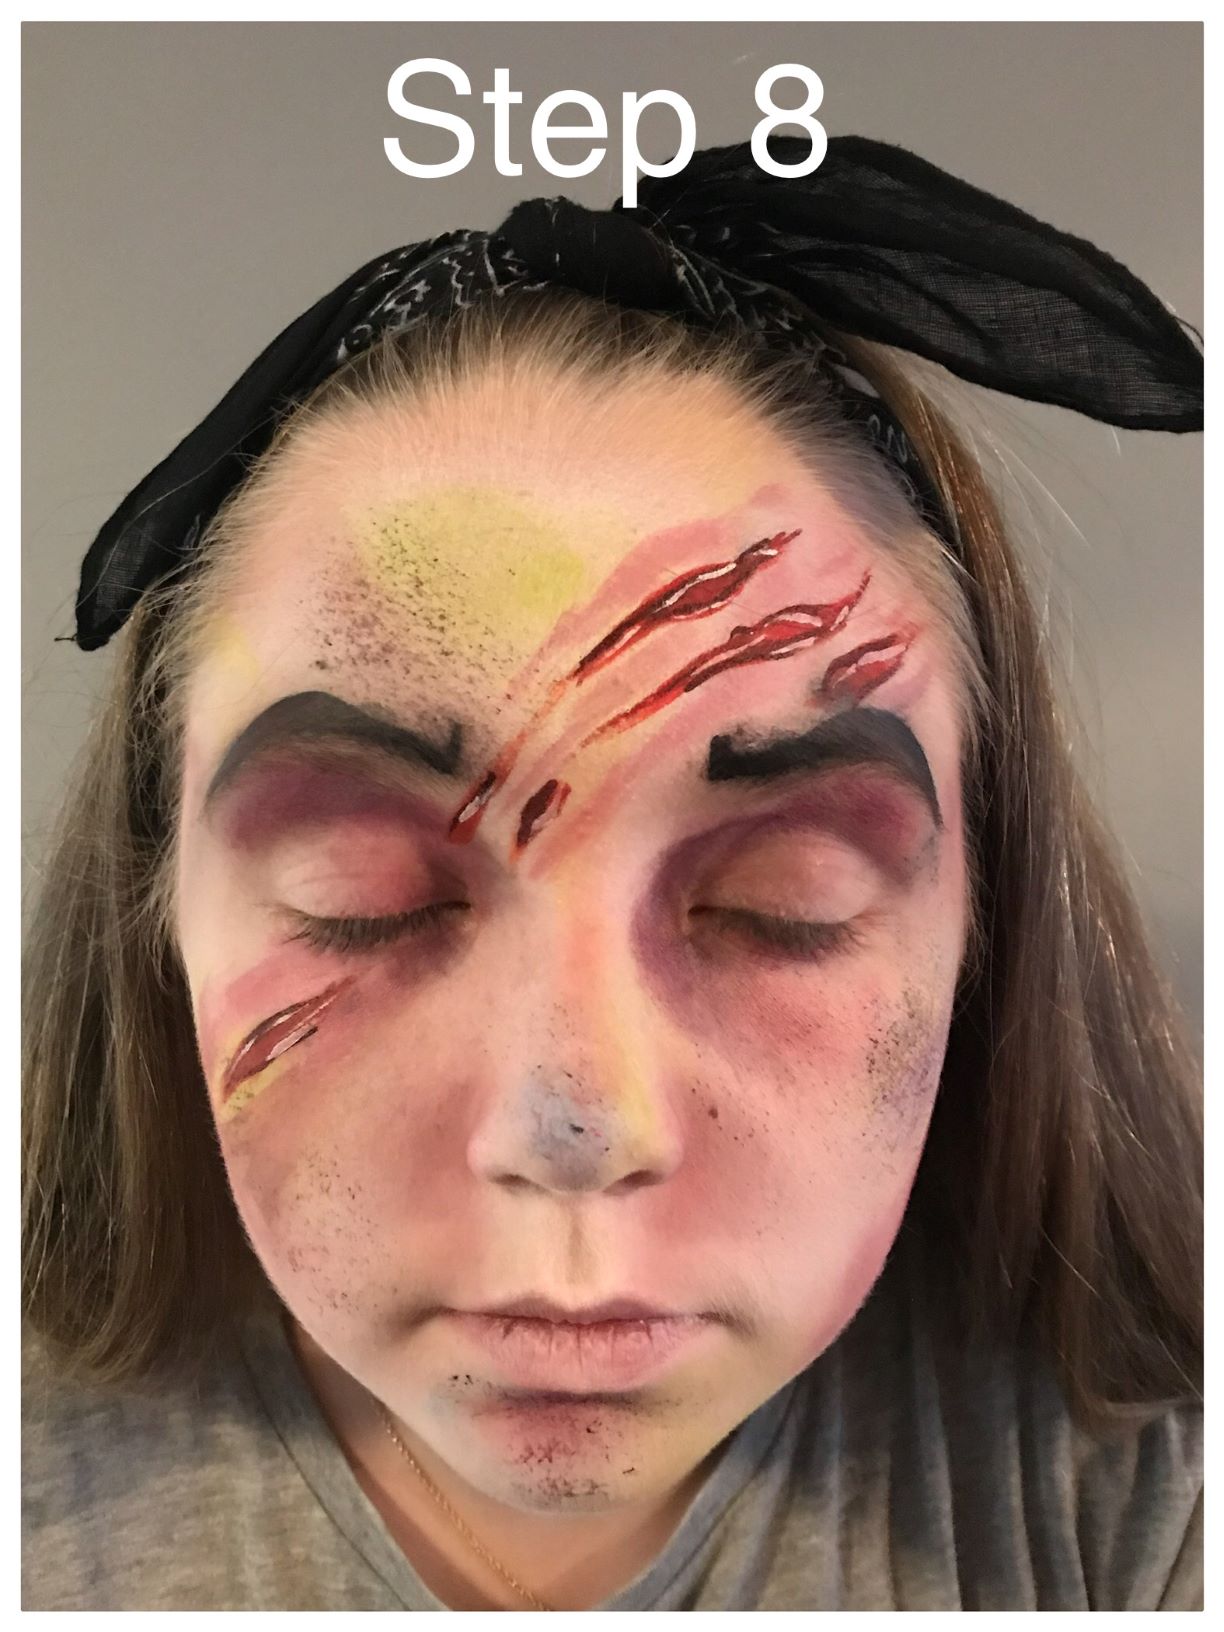
STEP 8
Using a very watery load of the Superstar Old Red paint, lay down some colour around the scratches. I find that outlining them, leaving a clear area between the wound edges and the Old Red wash, helps make them look swollen.
STEP 9
Using the DFX Black, draw some curved lines as stitches, and again, highlight these with the DFX white.

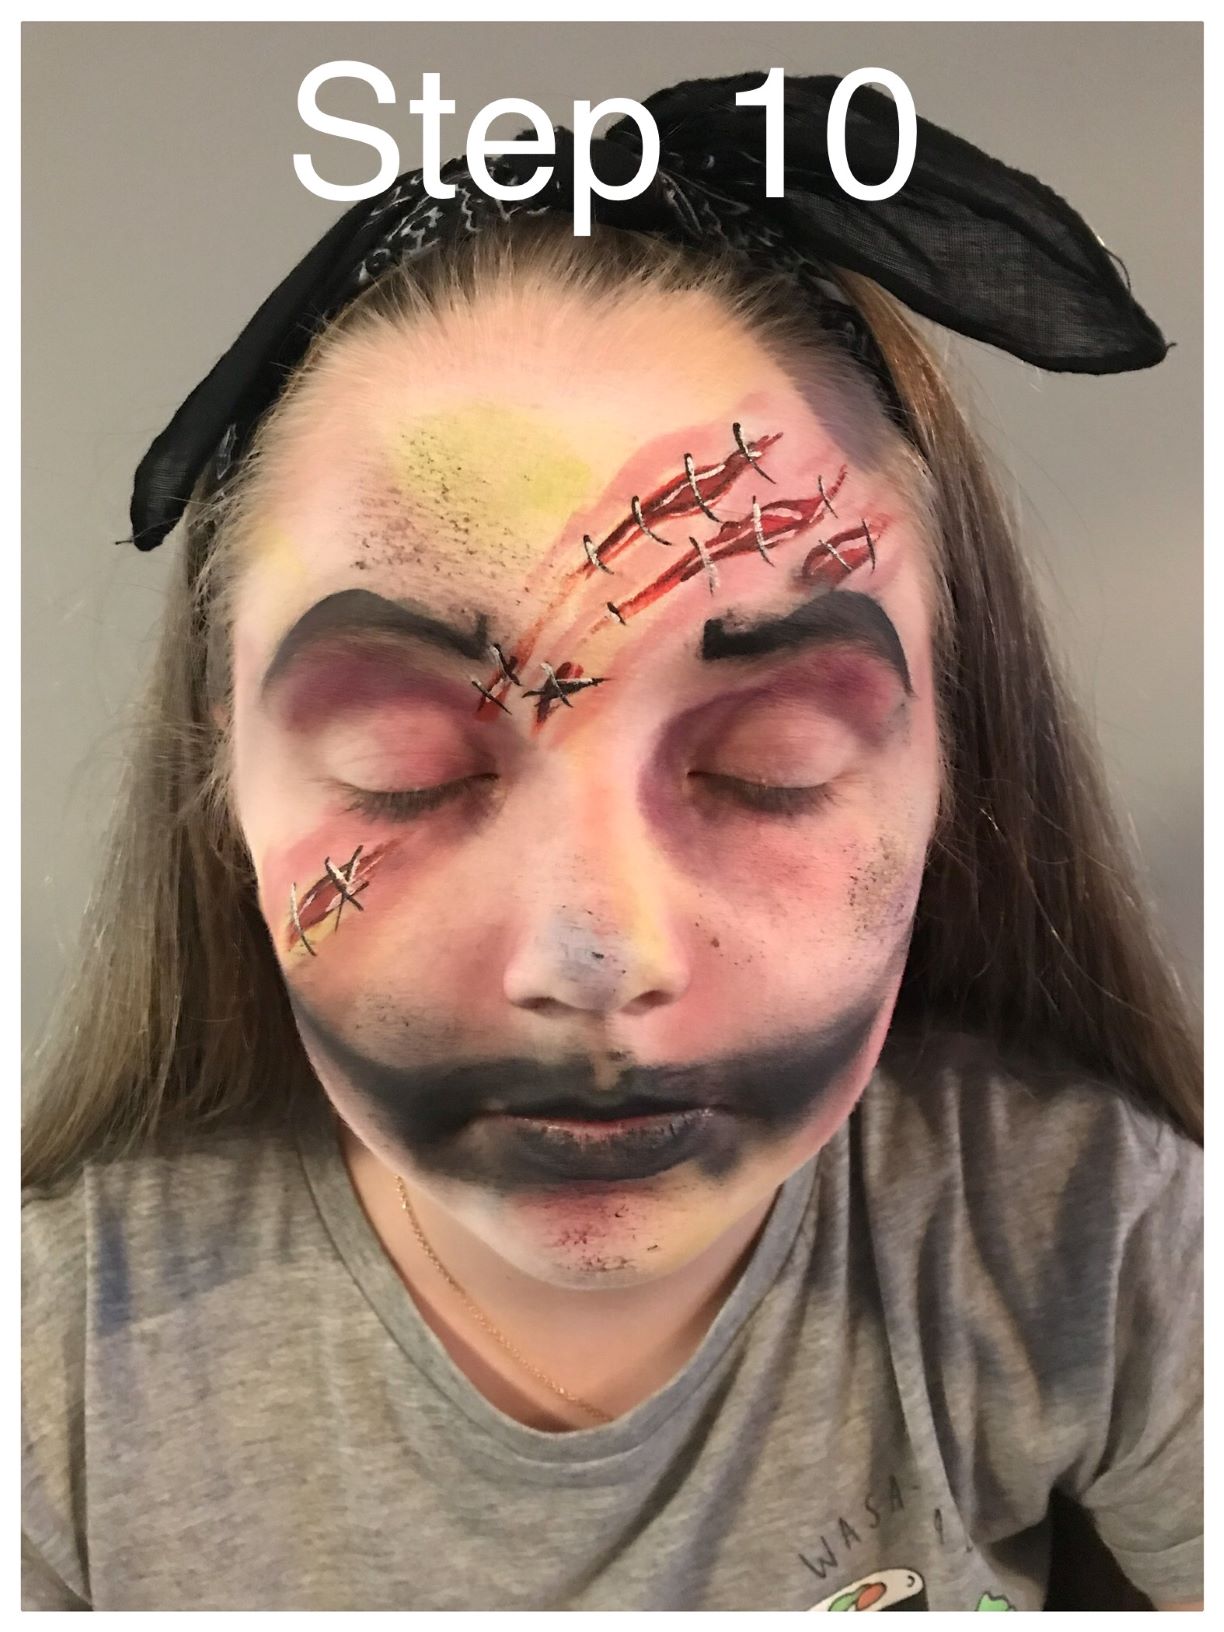
STEP 10
Using a sponge, roughly apply some Paradise Black to the mouth area, extending outwards and upwards under the cheekbone area. This is the base for the teeth, so it will be largely covered and doesn’t need to be perfect, but it does help to make sure that both sides of the face match.
STEP 11
Load the flora brush well with DFX white, and press the brush onto the lips and face to represent the teeth. I’m going to hazard a guess that zombies typically do not have perfect teeth, so don’t panic if they aren’t Hollywood worthy. I like to roughly outline some / all of the teeth for definition, extending the outline into a point above / below each tooth to add some depth.


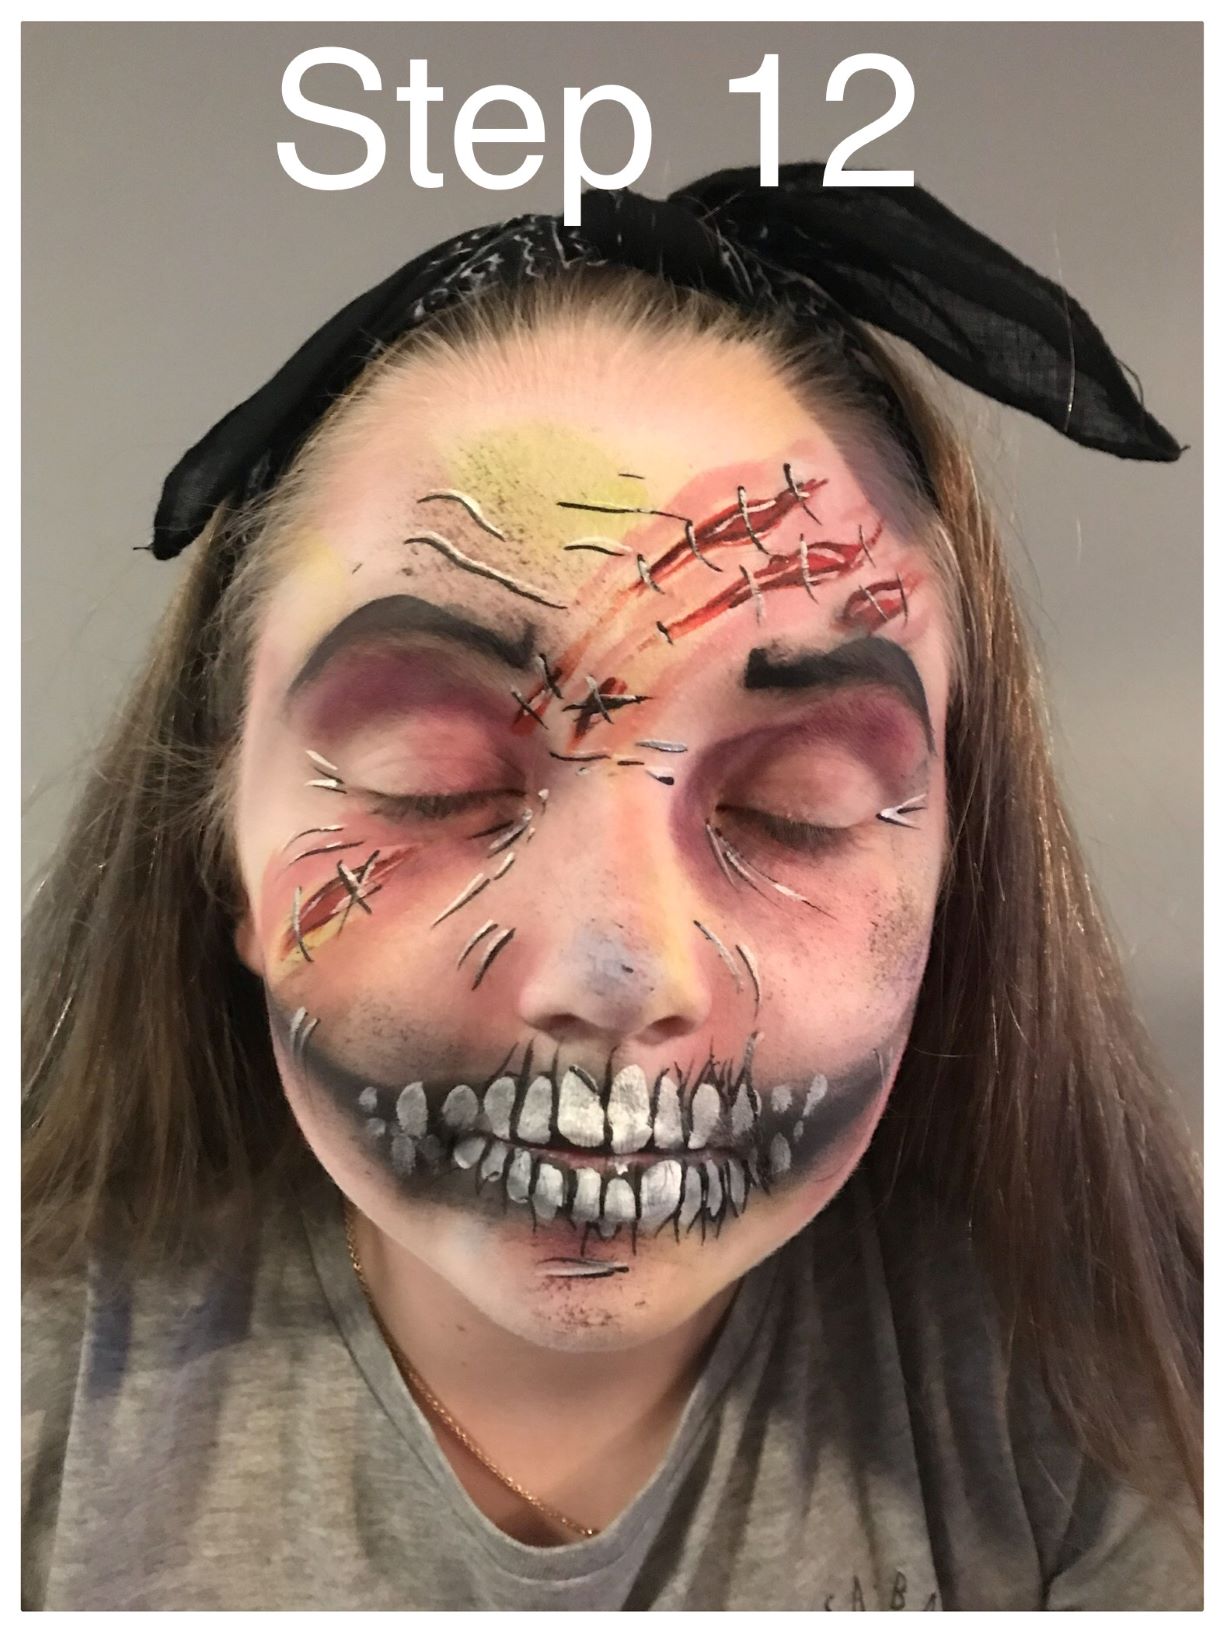
STEP 12
Using the number 2 brush, loaded with DFX Black, add some fine wrinkles in the areas which would typically wrinkle, such as the forehead, bridge of nose, around the eyes and nose. As with the stitches, add some tiny highlights in DFX White to create some depth
STEP 13
Using your stipple sponge, add some more scraping to any areas which look a bit bare

STEP 14
Using the number 2 brush and some DFX Black, add some nostrils. I like to smudge these a little for a less uniform look.

STEP 15
Load the round size 4 brush with the global red. You will need to make sure that it is quite a watery load. Use this to add blood details. I like to have blood coming from the eyes and nose, and around the mouth area.

STEP 16
Reload the brush with an even more watery load of global, and use this to flick paint at the face, giving the effect of blood splatters!

So there you have it! A super-fast zombie that takes just a few minutes to produce, and looks great! Where you have more time, you can add more detail, but don’t get hung up on perfection. The best part of this design is that imperfections are all part of being a zombie!

No comments:
Post a Comment